Creating DIY Halloween pumpkin ornaments is a fantastic way to add a touch of spookiness and creativity to your seasonal decorations. These handmade ornaments not only make for a fun crafting project but also a unique and eye-catching addition to your Halloween decor. In this essay, we will explore the step-by-step process of crafting these delightful pumpkin ornaments.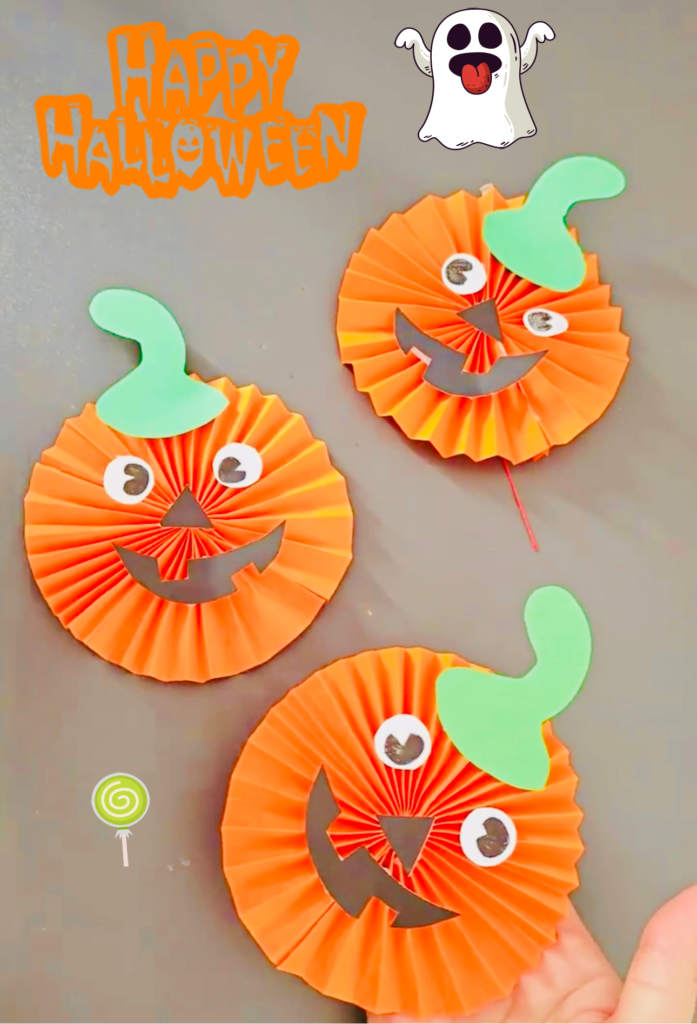
Materials You’ll Need:
1. Rectangular orange paper
2. Green paper for the pumpkin vine
3. White and black paper for eyes, nose, and mouth
4. Scissors
5. Double-sided tape
6. String for hanging
DIY Halloween Pumpkin Ornaments:
**1. Choosing the Right Paper:**
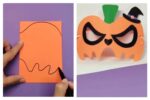
Start your DIY adventure by selecting a piece of rectangular orange paper. This will serve as the body of your Halloween pumpkin ornament.
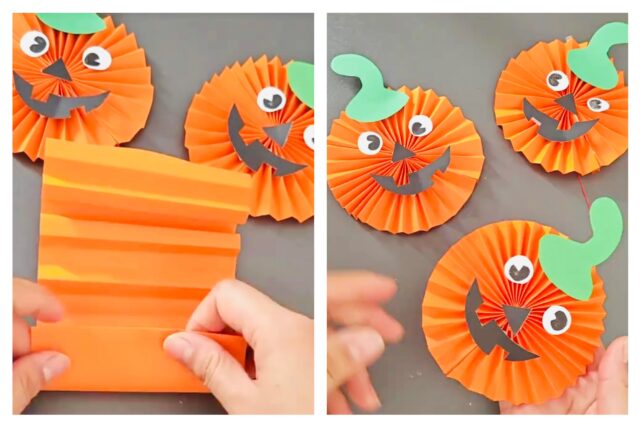
**2. Folding and Creating the Pumpkin:**
Follow the instructions in the video tutorial, carefully folding the orange paper to create the pumpkin shape. These intricate folds give your ornament depth and dimension. Secure the folds with string or twine to maintain the pumpkin’s form.
**3. Adding the Pumpkin Vine:**
Now, it’s time to bring your pumpkin to life with a vibrant green paper vine. Craft the vine by drawing a winding design on the green paper, then cut it out. Affix the vine to the top of the pumpkin using double-sided tape. This addition not only adds a touch of realism but also ensures that your ornament embodies the essence of a Halloween pumpkin.
**4. Creating the Expressive Face:**
The face of your Halloween pumpkin ornament is a key element that defines its character. Using white and black paper, you can craft expressive eyes, a nose, and a mouth. Cut out the desired shapes and arrange them on the pumpkin. Get creative with the facial expressions to give your pumpkin its own unique personality.
**5. Bringing it All Together:**
Once you are satisfied with the arrangement of the face, use double-sided tape to secure the facial features to the pumpkin. Make sure they are firmly attached so that your ornament is ready for display.
**6. Adding a String for Hanging:**
To make your Halloween pumpkin ornament ready for display, attach a string at the top. This will allow you to hang your creation from doorknobs, hooks, or anywhere you’d like to infuse a touch of Halloween spirit.
Crafting these DIY Halloween pumpkin ornaments is a wonderful way to get into the spooky spirit of the season. Not only do they offer a fun and creative outlet for your artistic talents, but they also make for charming decorations that can be enjoyed year after year. The process of turning a simple piece of paper into a delightful pumpkin face is a testament to the joy of handmade Halloween decor. So, go ahead and try your hand at this craft to add some extra charm to your Halloween celebrations. Happy crafting!
If you’d like to see more engaging DIY projects and stay updated with our latest content, please consider liking our Facebook page. We’re excited to share more creative ideas and inspiration with you. Happy Halloween crafting!
YOU MAY LOVE: DIY Halloween Pumpkin Paper Cutting Tutorial