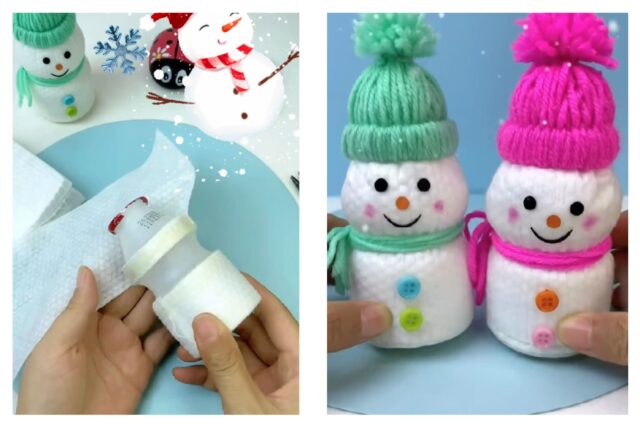
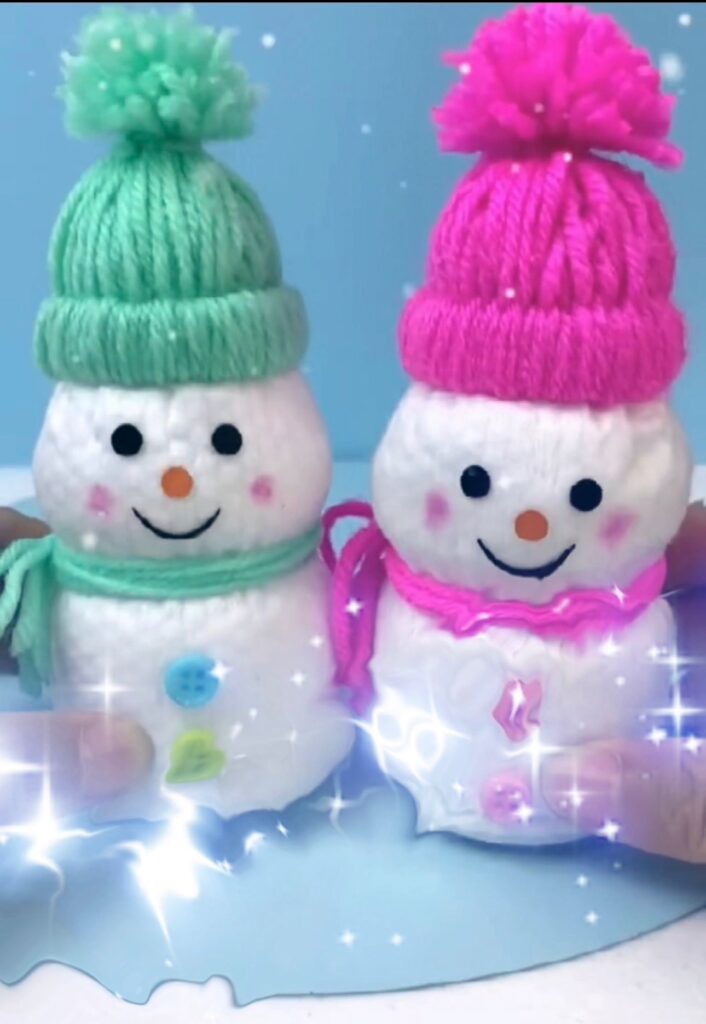
Winter is a season of festivities and joy, and one of the most iconic figures associated with this season is the snowman. The sight of a snowman with its carrot nose and coal eyes brings a warm and cozy feeling during the chilly winter months. Creating your own DIY Snowman Decorations can add a touch of whimsy and creativity to your holiday decor. In this DIY project, we’ll show you how to make a charming snowman from recycled yogurt bottles, white paper, yarn, and a toilet paper roll. It’s an eco-friendly and fun way to embrace the holiday spirit.
Before we dive into the step-by-step instructions, let’s gather the materials you’ll need for this project:
- Clean yogurt bottle
- White paper
- Yarn (black, red, or any color you prefer)
- Empty toilet paper roll
- Craft glue or a glue gun
- Scissors
- Black marker
- Orange craft foam or construction paper (for the carrot nose)
- Buttons or small, circular cutouts from colored paper
- Small twigs (for arms, optional)
- Ribbon or fabric (for a scarf, optional)
Step 1: Wrap the Yogurt Bottle
The first step in creating your DIY snowman is to take a clean yogurt bottle. Ensure that it’s washed and completely dry. Next, wrap the bottle with white paper. You can use regular white paper or even repurpose old newspapers or magazines for this. Secure the paper with glue, ensuring it’s evenly wrapped around the bottle.
Step 2: Create the Belt
To give your snowman a cute, festive touch, you’ll create a “belt” using yarn. Choose a color you like; black, red, or green work well for this purpose. Measure and cut a length of yarn that fits around the center of your snowman. Use glue to attach it securely in place.
Step 3: Craft the Snowman’s Hat
For the snowman’s hat, you’ll need an empty toilet paper roll. Cover the roll with black yarn to create the hat’s base. To do this, apply glue to the roll’s exterior, press the yarn firmly onto it, and continue wrapping it until the entire roll is covered. Once it’s dry, trim any excess yarn.
Step 4: Add the Hat to Your Snowman
Place the yarn-wrapped toilet paper roll on top of your snowman’s head to create the hat. Secure it in place using glue. You can adjust the hat’s position and angle according to your preference.
Step 5: Decorate the Snowman’s Face
Now comes the fun part—giving your snowman a face! Use your black marker to draw the snowman’s eyes and mouth. For the nose, cut out a small triangle from the orange craft foam or construction paper, resembling a carrot. Glue it in place just below the eyes. If you don’t have craft foam, you can also paint the nose on.
Step 6: Button Up
To create the snowman’s buttons, either glue small, colorful buttons down the front of the wrapped yogurt bottle, or cut out small circular shapes from colored paper and attach them.
Step 7: Optional Accessories
For additional flair, you can add arms to your snowman. Small twigs work well for this purpose, and you can attach them on either side of the bottle. You can also wrap a ribbon or a piece of fabric around the snowman’s “neck” to create a scarf. Feel free to get creative and make your snowman unique!
Here is the video tutorial:
DIY Snowman Decorations from a recycled yogurt bottle is not only a fun and eco-friendly DIY project but also a delightful way to add a touch of winter magic to your home decor. This craft is perfect for kids and adults alike and allows for personalization and creativity. By repurposing items you already have at home, you can reduce waste and enjoy the satisfaction of making your own festive decorations. Whether you display your yogurt bottle snowman on a shelf, as a table centerpiece, or in a window, it’s sure to bring a smile to your face and spread some holiday cheer. So, grab your materials, let your imagination run wild, and craft your very own recycled snowman this winter season!
YOU MAY LOVE: DIY Halloween Pumpkin Mask Tutorial